Drawing a chess board might seem like a straightforward task at first glance, but anyone who has actually sat down and tried it knows there is more to it than drawing a grid and filling in squares. Getting the proportions right, adding perspective, shading alternating squares cleanly, and eventually incorporating chess pieces into the composition all require a bit of patience and practice.
This guide walks through everything a person needs to know about chess board drawing, from the basic grid setup to more advanced techniques like perspective and shading. Whether someone is learning to draw for the first time or is an experienced artist looking to add a chess board to a larger illustration, there is something useful here for every skill level.
Why Learning Chess Board Drawing Is Worth the Effort
A chess board is one of those subjects that teaches several fundamental drawing skills at once. It involves geometric precision, understanding of proportion, shading technique, and, when drawn in perspective, a working knowledge of vanishing points and depth.
For students learning technical drawing or illustration, a chess board sketch is a classic exercise because it tests so many skills simultaneously. For hobbyists, it is a satisfying subject because the finished result is immediately recognizable and visually striking. A well-executed chess board drawing, even a simple one, has a clean, graphic quality that looks impressive whether it is done in pencil, ink, or digital tools.
There is also the appeal of combining chess board drawing with chess piece illustrations. A full chessboard scene, with figures positioned mid-game, is a genuinely compelling piece of art that many illustrators and graphic designers return to throughout their careers.
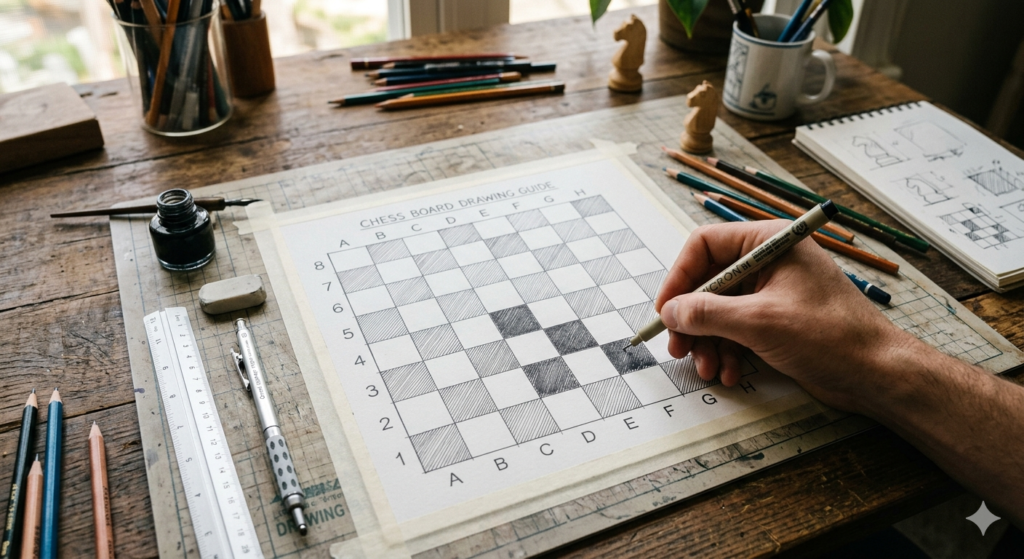
Basic Tools for Chess Board Drawing
Before getting into the actual process, it helps to have the right tools on hand. The good news is that a chess board drawing does not require anything expensive or specialized.
For Pencil Drawing
A ruler is the single most important tool for a chess board sketch. Without one, getting consistent square sizes across 64 squares is nearly impossible. A set square or drafting triangle also helps with perfectly perpendicular lines.
Pencils in a range of grades are useful: an H or 2H pencil for light construction lines that can be erased later, and an HB or 2B for the final outlines and shading. A good eraser (preferably a kneaded eraser for light corrections and a white vinyl eraser for heavier cleanup) rounds out a basic pencil drawing setup.
For Ink Drawing
Fine-line pens or technical drawing pens (0.1mm to 0.5mm) work well for chess board illustrations. They give clean, consistent lines and allow for precise hatching or crosshatching when shading the dark squares.
For Digital Drawing
Digital artists typically use software like Adobe Illustrator, Procreate, or even simpler tools like Sketchbook. Most of these programs have grid and ruler overlays that make chess board drawing significantly easier. The process is largely the same as traditional drawing, but with the added benefit of being able to undo mistakes instantly.
How to Draw a Chess Board Step by Step
This section breaks down the process into clear, manageable stages. Following these steps produces a clean, accurate chess board drawing from scratch.
Step 1: Draw the Outer Border
Start by drawing a square. For a standard chess board drawing on paper, an 8-inch by 8-inch square works well because each internal square will be exactly 1 inch. Mark the square lightly in pencil so construction lines can be erased later.
For a more polished result, draw a slightly larger outer border around the main square to represent the frame or edge of the board. Most physical chess boards have a border of about one square’s width around the playing area.
Step 2: Divide the Square Into a Grid
Using a ruler, divide each side of the square into 8 equal sections. Then draw horizontal and vertical lines through all the marked points to create the 8×8 grid. This gives 64 squares total, which is the correct number for a standard chess board.
Take time with this step. Even a small error in spacing early on will compound across the grid, making the squares increasingly uneven. If the measurements feel off, erase and redo rather than trying to correct mid-grid.
Step 3: Shade Alternating Squares
This is the step that transforms a plain grid into a recognizable chess board drawing. Starting from the top-left square (which should be a dark square, labeled a8 in standard chess notation), shade every other square in a checkerboard pattern.
For a pencil drawing, shading can be done with hatching (parallel lines), crosshatching (intersecting lines for darker tones), or smooth graphite blending. For a clean, graphic look, filling the dark squares solidly with a 2B or 4B pencil and leaving the light squares white creates a striking contrast.
A useful tip: before shading, lightly mark each square that should be dark with a small dot or X. This prevents the common mistake of accidentally shading the wrong square, which can be frustrating to correct after significant shading work.
Step 4: Add Labels (Optional)
Standard chess boards are labeled with letters (a through h) along the horizontal axis and numbers (1 through 8) along the vertical axis. Adding these labels to a chess board sketch gives it an authentic, reference-quality look. Use a consistent font size and keep the labels outside the main border.
Drawing a Chess Board in Perspective
A flat, top-down chess board drawing is great for diagrams and reference illustrations, but a perspective chess board drawing creates a much more dynamic and visually interesting composition. This technique is commonly used in chess board art, book illustrations, and digital game graphics.
Two-Point Perspective Basics
A chess board drawn in two-point perspective uses two vanishing points on the horizon line, typically placed well outside the edges of the paper. The front corner of the board points toward the viewer, and the two sides recede toward their respective vanishing points.
The trickiest part of a perspective chess board drawing is dividing the receding sides into 8 equal segments, since equal spacing in real life does not look equal in perspective. The correct method is to use diagonal lines from corner to corner within the perspective grid to find accurate division points. This is known as the “diagonal division” method and is a standard technique in perspective drawing courses.
Getting this right takes a few attempts, but the result, a chess board that appears to sit convincingly in three-dimensional space, is well worth the effort.
Adding Chess Pieces to the Drawing
Once the board is in place, many artists want to add chess pieces to complete the scene. Drawing chess pieces well is a separate skill, but a few general guidelines apply.
Each piece should sit within its square and feel proportionally consistent with the board scale. A king, being the tallest piece, should appear roughly two to two and a half square widths in height. Pawns, the smallest pieces, sit at about one square width tall.
When drawing pieces in a perspective chess board illustration, the pieces must also follow the same perspective rules as the board. Pieces closer to the viewer appear larger; those further away appear smaller. Ignoring this rule, even slightly, makes a piece look like it is floating or falling over.
For a chess board sketch focused on a specific game position, it helps to reference the actual position first and then draw the pieces in their correct squares. This is particularly useful for illustrators creating chess book covers or editorial illustrations.
Digital Chess Board Drawing: A Faster Approach
For those working in digital environments, chess board drawing becomes considerably faster. Most vector programs allow a user to draw one square, duplicate it, and arrange copies into the full grid using alignment and distribution tools. The entire board can be set up in minutes rather than the 20 to 30 minutes a careful pencil version requires.
Digital tools also make alternating shading trivial: select all dark squares, apply a fill color, and the job is done. Adjusting the color, texture, or style of the board afterward is equally simple.
That said, many artists still prefer to draw a chess board by hand, at least initially, because the process of constructing the grid manually builds spatial reasoning and precision habits that carry over into all other areas of drawing.
Helpful Tips for Better Chess Board Drawing Results
A few practical points that make the process go more smoothly:
Working on graph paper is one of the simplest shortcuts for beginners. The pre-printed grid removes the need for careful ruler measurement and lets someone focus entirely on the shading and finishing stages.
Keeping a consistent shading direction across all dark squares gives the drawing a unified, professional look. If hatching lines run diagonally from top-left to bottom-right in one square, they should run the same direction in every square.
Using a light box or tracing paper to refine an initial rough draft before committing to final lines is a technique many professional illustrators use. Drawing the construction grid roughly first, then refining it cleanly on a fresh layer, produces a much cleaner result than trying to get everything perfect on the first pass.
Final Thoughts
Chess board drawing is one of those skills that rewards the time put into it. It is precise enough to be a genuine technical challenge, creative enough to allow for personal style, and versatile enough to fit into countless artistic contexts, from game design and editorial illustration to personal sketchbooks and decorative art.
Anyone who sits down with a ruler, a pencil, and a bit of patience will find that the process is more enjoyable than it first appears. And once the flat version feels comfortable, exploring perspective chess board drawing opens up a whole new range of compositional possibilities.
The chess board has been a symbol of strategy, elegance, and intellectual pursuit for centuries. Capturing it well on paper is a small but genuinely satisfying achievement.
Pingback: World Rapid Chess Championship: Everything You Need to Know About Chess's Most Thrilling Title Race - Chess Next Move - Best next move calculator
Pingback: RE2 Chess Puzzle 2nd Run: A Complete Guide to Solving the Monitor Room Mystery [1] - Chess Next Move - Best next move calculator